EU
EU
 USA
USA Canada
 UK
UK Australia
 New Zealand
 Japan
Japan Singapore
 UAE
UAE India
IndiaWith 10-point precision multitouch and pressure sensitive stylus support, Clarity Touch Monitors let you interact with your Apple computer in whole new ways. Unfortunately, macOS requires a little extra software to realise this potential.
You’ve unboxed your brand-new Clarity Touch – you hook it all up to your MacBook and discover that… the touch isn’t working great. Your taps might even be registering on the wrong screen.
We’re sorry it doesn’t work perfectly out of the box, but thankfully, there’s an easy way to fix things: installing our Clarity Touch drivers for macOS.
Now, because we have to give the software permission to read and modify your Mac’s control inputs, the drivers require some extra permissions which make installation a little more complicated than usual, so we’ve put together an easy-to-follow guide to help you install them.
Install the Drivers
1. Double click on Clarity Pro Touch macOS drivers.dmg. It will open up a new window with the program to install the drivers.

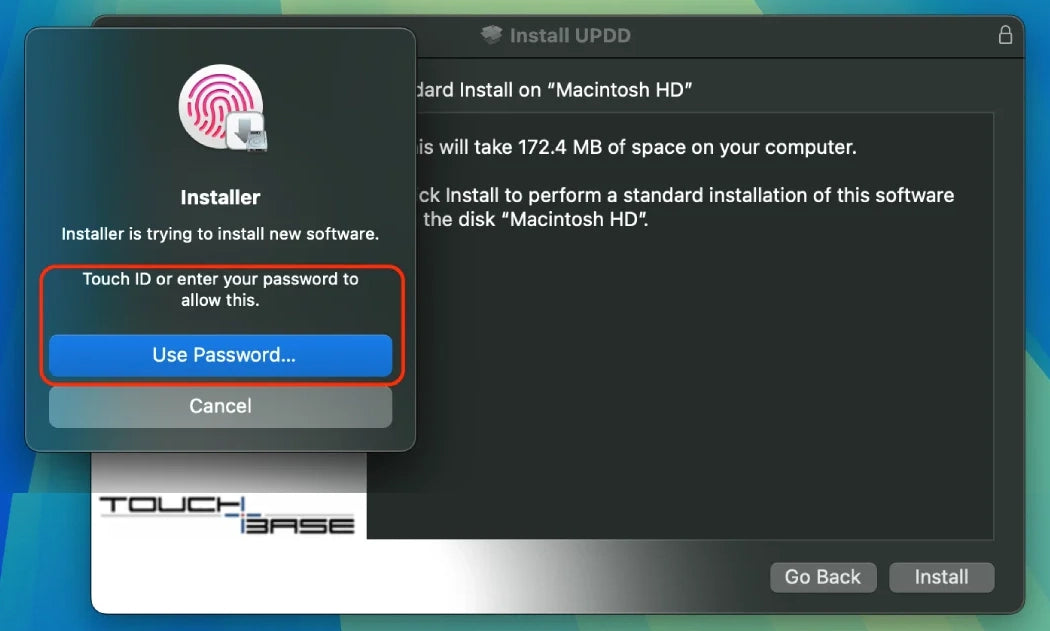
2. Double click on UPDD_07_01_76.pkg.(Universal Pointer Device Driver), this will launch the UPDD installer.

3. Follow the Installer’s instructions, allowing the process to proceed and entering your password when prompted.


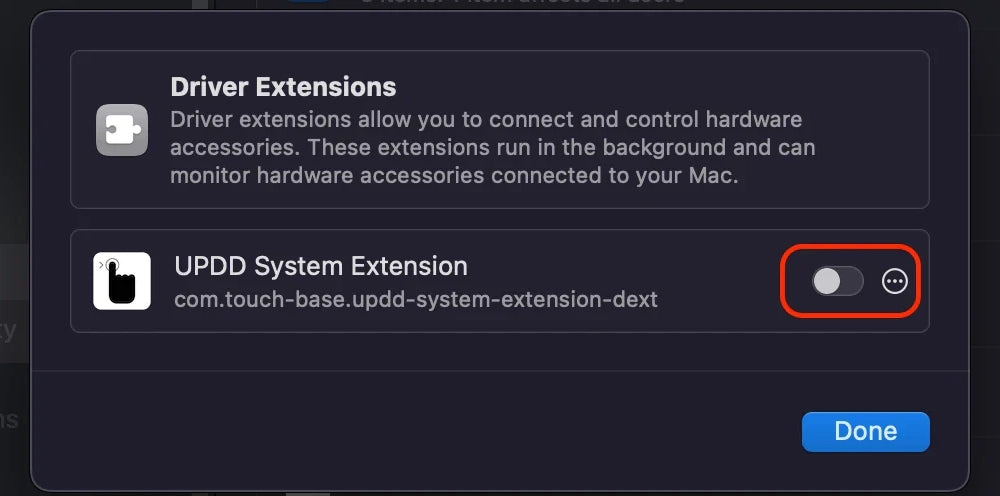
4. When you see this pop-up, hit “Open System Settings” to open the Driver Extension menu and the click the grey slider to allow UPDD to function as intended. You will be asked to enter your password one last time to confirm this decision.
a. If you accidentally closed the Driver Extension menu without giving UPDD the correct permissions, you can reopen it by
- i. Opening “System Settings”
- ii. Clicking “General” in the left hand menu
- iii. Clicking “Login Items & Extensions” on the right.
- iv. Scroll down until you see “Driver Extensions” and hit the i symbol.


5. Congratulations, you’ve made it through a tricky install process and your touchscreen should now be working. However, there are still a few more steps to make sure it’s working at its best.
Identify Your Touchscreens
1. Once the touch drivers are installed, you need to ‘identify’ your touchscreens, so that your computer knows which screen to apply your touch input to. Click on the “UPDD Console/Daemon” icon in your menu bar and select “Identify”.

a. One of your screens will turn white, with a target in the middle. If that screen is a touchscreen, touch the target until it turns blue, then remove your finger.
b. If it’s another screen, click “next” until the target moves to your touchscreen.
Configure Pinch to Zoom
By default, our touch drivers use a ‘smart magnifier’ to help you zoom into small details, accessible via a two finger tap. If you’d prefer zooming to work like on your phone or tablet, we recommend following the instructions below to enable pinch to zoom, while setting a two finger tap to right click on the screen, like how your Mac trackpad works.
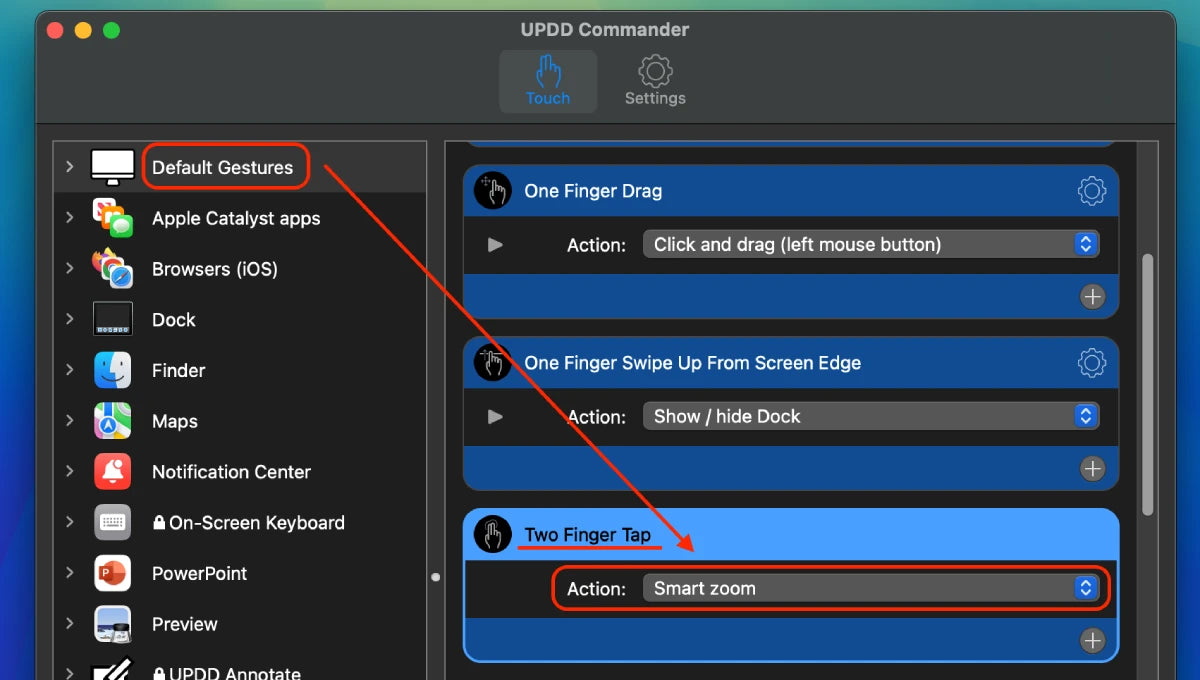
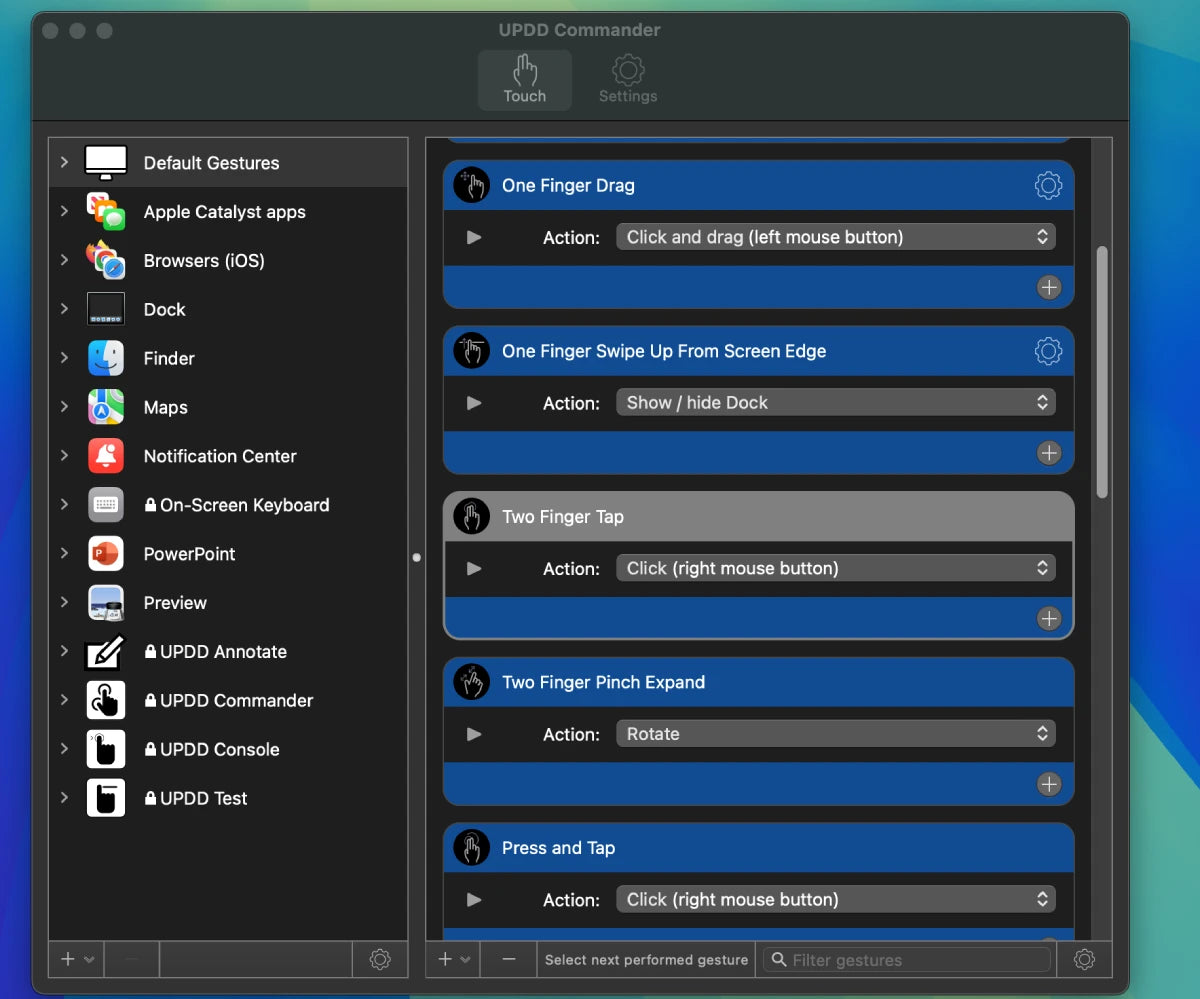
1. To activate “pinch to zoom”, click on the UPDD Commander icon in your Mac’s system tray and open the “Settings” menu.

2. Click on “Default Gestures” in the left hand pane, then scroll down to “Two Finger Tap” on the right side. Click on the action “Show/Hide Smart Magnifier”.
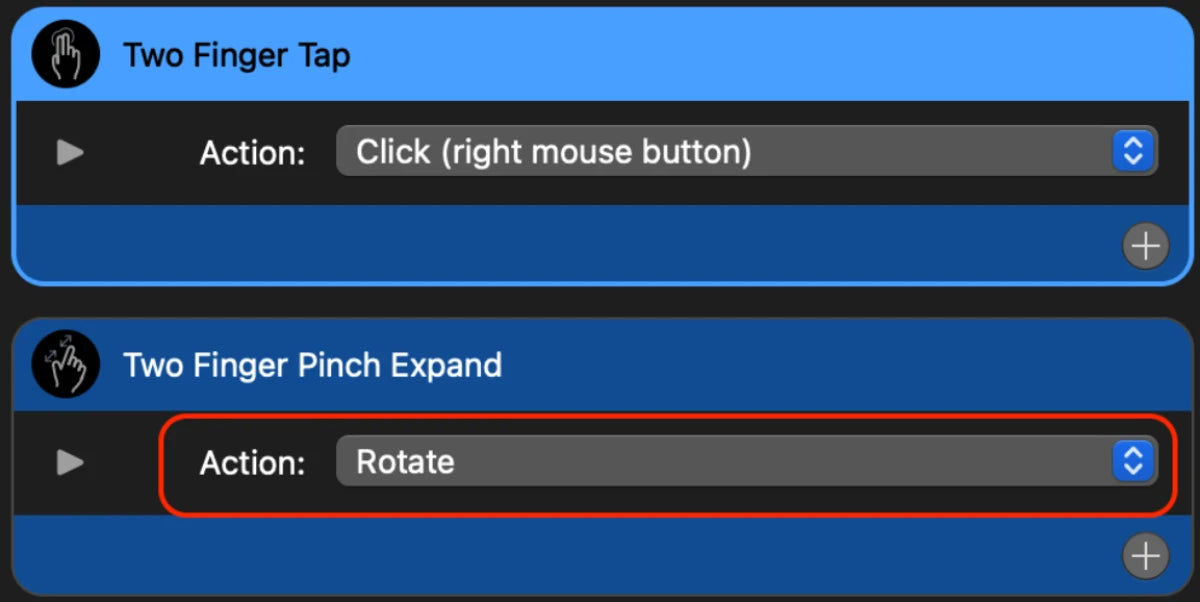
3. Find “Click” that appears in the menu and select that, to replace the “Smart Magnifier” function. Then swap it from a “Left” click to a “Right” click to make tapping with two fingers operate like the Mac trackpad does.


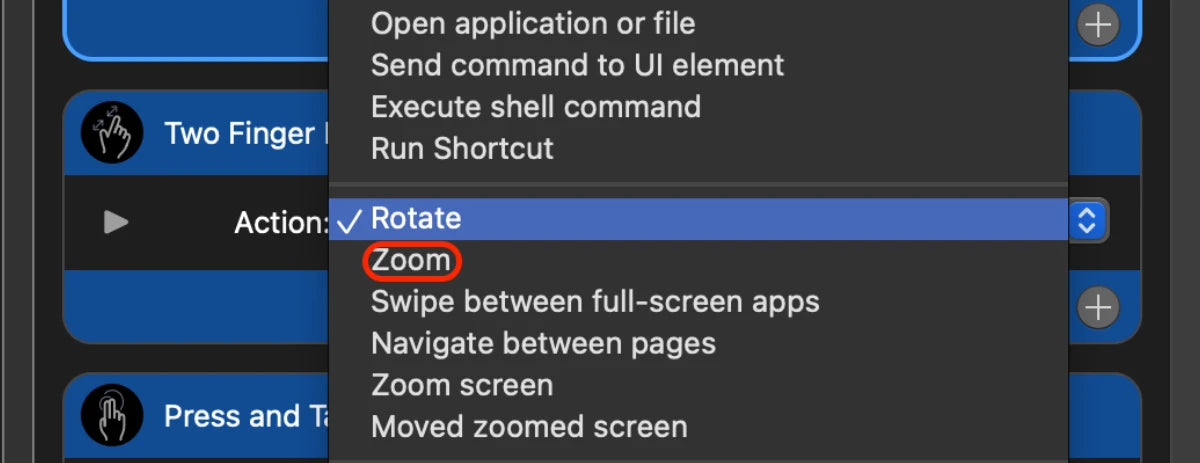
4. Below Two Finger Tap is Two Finger Pinch Expand. Change that gesture’s action to “Zoom”.
And that’s it, your touchscreen’s features have been fully unlocked for your Apple computer, including the ability to use an Clarity Active Stylus Pen (or another Microsoft Pen Protocol 2. (MPP) 2.0 compatible stylus) for pressure sensitive stylus input.
Additional information for using UPDD:
Configuring Custom Controls:
With UPDD Commander, you can change what different touch gestures do – either on a program-by-program basis, or for the entire operating system like you did earlier by changing the “action” of “Two Finger Tap” and “Two Finger Pinch Expand”.
To change a gesture, simply select the program you wish the gesture to apply to on the left (or select “Default Gestures” for system-wide settings), find the gesture you want and change the “action” on the right.
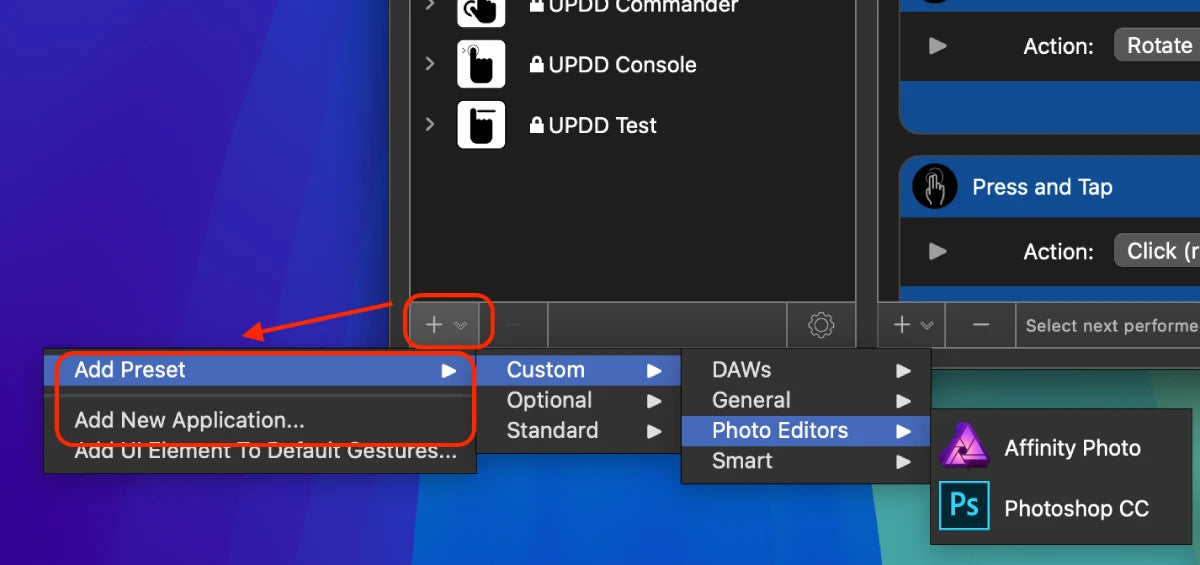
With the Plus symbol at the bottom of the program list, you can add additional programs. Some custom configurations for popular programs are included, such as Photoshop and Ableton Live, while others you’ll have to select manually via the “Add a New Program” option.
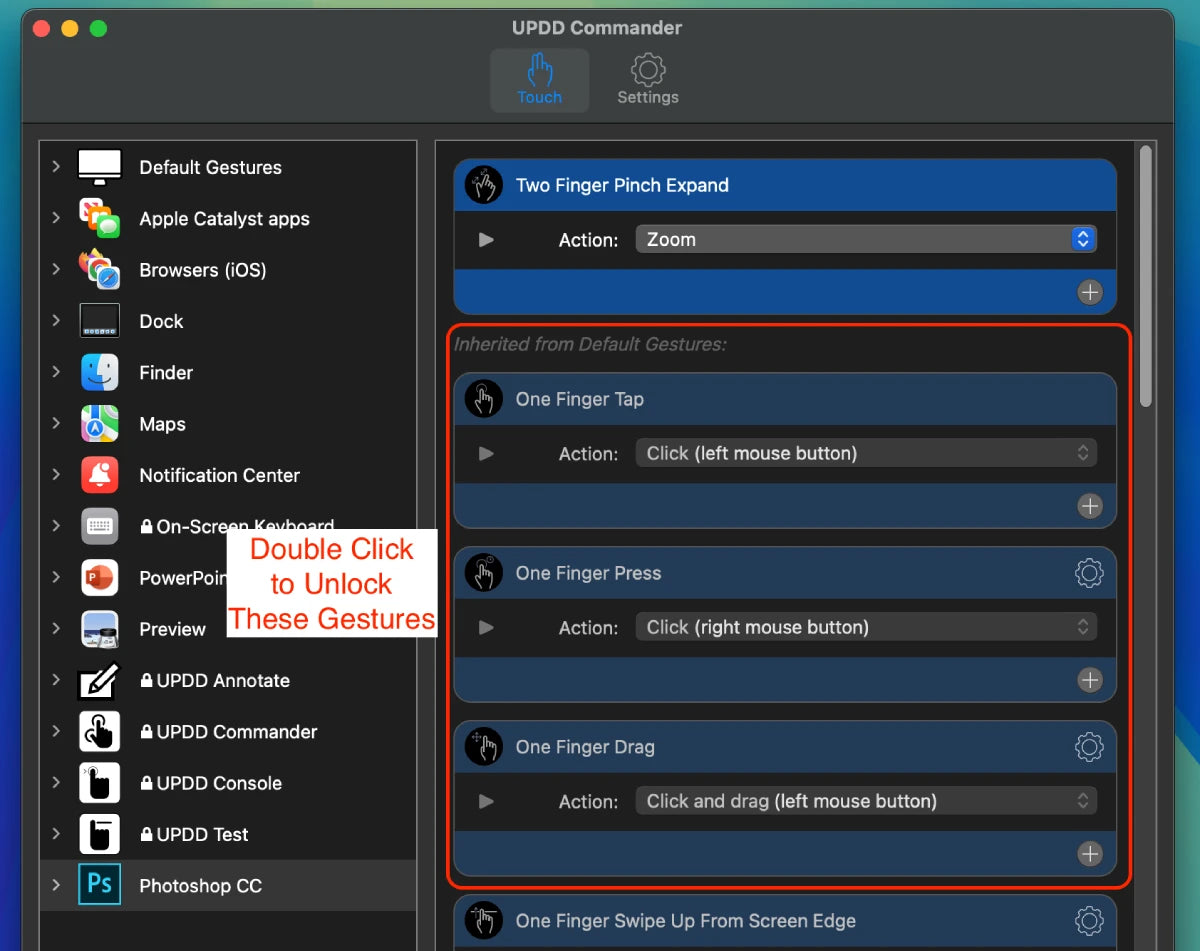
Once you’ve selected a customer application on the left, you may see most of the gesutres are greyed out – these gestures are using the same commands as set in “Default Gestures”.
To override them for your chosen app, double click on the gesture and then change its action.
To delete your new setting, right click on the gesture and select “Delete Gesture”.
If you can’t see the gesture you want in the list on the right, click the + icon at the bottom to access a list of lesser used gestures, such as three, four and five finger motions.

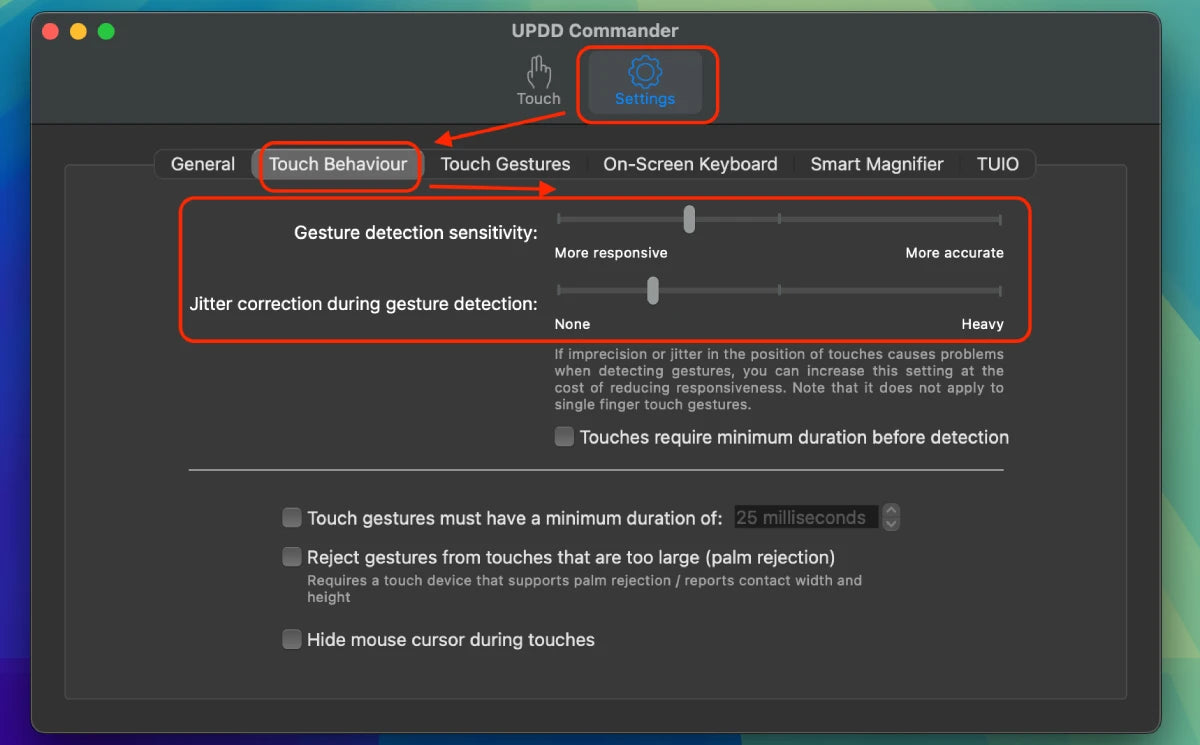
Configure UPDD’s Feel and Responsiveness
The UPDD touch drivers can be configured to react more quickly your gestures if you feel they’re too slow, or to go a bit slower to ensure they correctly interpret your gesture. These settings can be found in UPDD Commander’s settings menu.
There are no ‘correct’ settings for these sliders, and we recommend trying a few different settings to see how you prefer your gestures to feel.
Troubleshooting UPDD:
If you encounter issues with UPDD, we first recommend going into your System Settings -> General -> Login Items & Extensions -> Driver Extensions menu and make sure that permissions are enabled for all UPDD components.

A component lacking permission is the #1 cause of issues we’ve encountered.
Because it requires low-level system access and unusual permissions, UPDD can be a complex program to resolve issues in.
The most common issue you may encounter is UPDD reporting that no touch devices are detected.

If this happens, try:
1. Reconnecting your computer to your touch monitor
2. Connecting a USB device such as a mouse or memory stick through your monitor and make sure your computer can access it. If your computer can’t, that means there’s a problem with the data connection between your computer and the monitor. Consult your manual or contact ALOGIC Support (support@alogic.co) for help resolving this.
3. Restart your computer and monitor.
4. Finally, if issues persist, we have found it is often quicker to reinstall the drivers if you encounter issues, as this will often resolve them.
To uninstall UPDD, you have to use the “UPDD Uninstall” program in your Mac’s system-level “Applications” folder.
In order to access this, open Finder and hit CMD+SHIFT+G. This will open a menu – type “/Applications” and hit enter. The folder that opens will have a folder called “Utilities” – UPDD uninstall will be there.


After you’ve run the uninstaller, restart your computer and reinstall them following the above steps.
If your issue persists, we recommend advanced users check the UPDD drivers’ extensive documentation here first: https://support.touch-base.com/Documentation/, otherwise contact ALOGIC support (support@alogic.co) and we’ll help sort out your problem.